

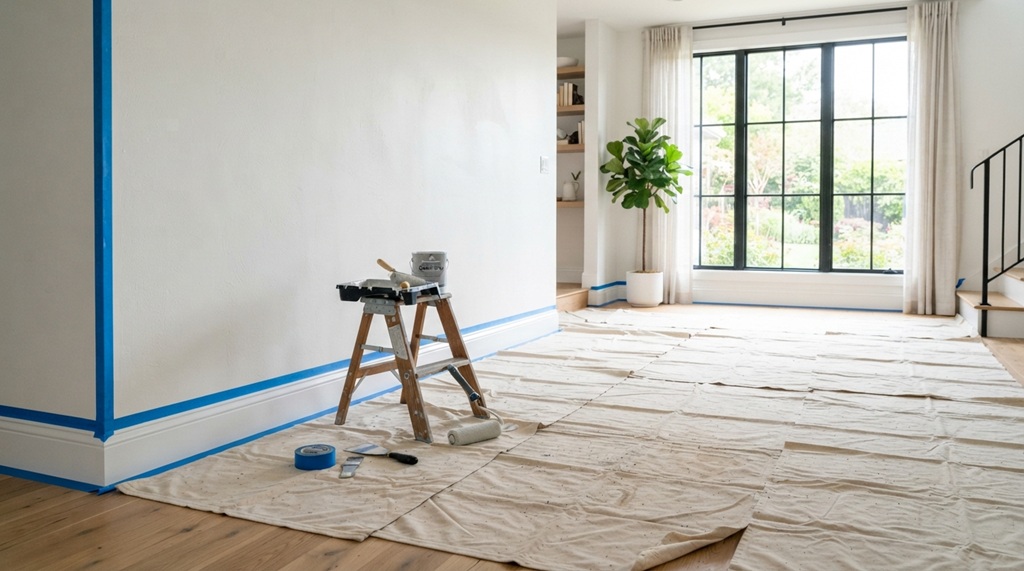
Preparing your house for painting means cleaning the walls, repairing damage, sanding rough spots, and protecting surfaces you don’t want painted. Skip this step, and even the best paint will peel, crack, or look uneven within a year. Do it right, and your paint job can last a decade or more.
Most homeowners rush straight to the fun part: picking colors and opening cans. But painters agree on one thing. Prep work is 80% of the job. It’s not glamorous, but it’s what separates a professional-looking finish from a patchy DIY job.
This guide walks you through every step of house painting prep, room by room and surface by surface. Whether you’re painting one bedroom or getting your whole home ready to sell, these steps apply.
Why Painting Prep Matters More Than the Paint Itself

Good prep work determines how long your paint lasts and how smooth it looks. Paint sticks best to clean, dry, and slightly rough surfaces. Skip prep, and paint bonds poorly to dust, grease, or glossy old paint.
Think of paint like a sticker. A sticker won’t stay on a dirty or dusty surface. It peels off fast. Paint behaves the same way. Dirt, oil from hands, and old flaking paint all get between the new paint and the wall. Over time, that new coat lifts, bubbles, or cracks.
There’s also a resale angle here. Real estate agents often say fresh paint is one of the highest-ROI upgrades before listing a home. But buyers notice sloppy prep work fast. Drips, uneven edges, and visible patches signal a rushed job and that can hurt a home’s perceived value, even if the color choice is perfect.
Gather the Right Tools and Materials First
You need the correct tools before you start, or you’ll waste time mid-project running to the hardware store. Here’s what most painting jobs require.
Basic Supplies Checklist
- Painter’s tape (not regular masking tape it peels cleaner)
- Drop cloths or plastic sheeting
- Sandpaper (medium and fine grit)
- Spackle or filler for holes and cracks
- Putty knife
- TSP cleaner or a mild soap-and-water mix
- Sponges and clean rags
- Primer suited to your surface
- A sturdy ladder
- Safety gear: gloves, a dust mask, and safety glasses
Optional but Helpful Tools
- A shop vacuum for sanding dust
- A caulking gun for gaps around trim
- An extension pole for rollers
- A 5-in-1 painter’s tool for scraping and opening cans
Buying quality painter’s tape alone can save you hours of touch-up work later. Cheap tape lets paint bleed underneath, which means crooked lines you’ll need to fix by hand.
Clean Every Surface Before You Touch a Brush
Clean walls hold paint better than dusty or greasy ones, so this step comes before any sanding or patching. Dust, cobwebs, and cooking grease all sit between the wall and the new paint layer, weakening the bond.
Start by wiping down walls with a dry microfiber cloth to remove loose dust. Then mix warm water with a mild dish soap, or use a TSP (trisodium phosphate) solution for kitchens and bathrooms where grease and mildew build up. Wipe the walls in small sections, then rinse with a clean, damp cloth.
Let everything dry fully before moving to the next step. Painting over damp walls traps moisture underneath, which can cause bubbling or mold down the road.
A tip most guides skip: run your hand flat across the wall after it dries. If you feel any grit, dust, or tackiness, clean that spot again. Your eyes can miss what your fingers catch immediately.
Repairing Cracks, Holes, and Surface Imperfections
Prepping your walls is the single most critical step toward achieving a flawless, high-end finish, as new paint actually accentuates underlying damage rather than concealing it under directional light. Every crack, dent, and nail hole must be meticulously filled with spackle or joint compound, then sanded until completely flush with the surrounding drywall. Tackling this foundational prep work yourself is one of the most cost-effective ways to refresh your interior space; however, if you are undertaking surface prep as part of a larger, high-impact renovation, pair these techniques with our smart strategies on remodeling your kitchen on a tight budget to elevate your entire home’s aesthetic while maximizing your ROI.
Small Holes and Nail Marks
Fill small holes with lightweight spackle using a putty knife. Apply a thin layer, let it dry per the product’s instructions, then sand it flush with fine-grit sandpaper. Wipe away the dust before painting.
Larger Cracks or Water Damage
Bigger cracks need a different approach. Widen the crack slightly with a utility knife, apply a flexible caulk or patching compound, and let it cure fully this can take 24 hours or more. Water-damaged areas may need a stain-blocking primer to stop marks from bleeding through the new paint.
Peeling or Flaking Old Paint
Scrape off any loose or peeling paint with a putty knife or scraper. Sand the edges so they blend smoothly into the surrounding wall. If your home was built before 1978, test old paint for lead before sanding — the EPA recommends this for older properties, since disturbing lead paint can release harmful dust.
Sand and Smooth the Surfaces

Sanding creates a slightly rough surface that helps new paint grip, especially over glossy or previously painted walls. Skip this step on shiny surfaces, and your new paint may slide off in sheets months later.
Use medium-grit sandpaper (around 120-150 grit) for rough patches and repairs. Switch to fine-grit sandpaper (220 grit) for a final smoothing pass across the whole wall. Sand in gentle, circular motions rather than pressing hard in one direction.
Once you finish sanding, vacuum the dust or wipe it down with a slightly damp cloth. Leftover dust ruins paint adhesion just as much as leftover dirt does.
Protect Trim, Floors, and Fixtures
Taping and covering everything you don’t want painted saves you hours of cleanup and touch-up work later. It’s tempting to skip this step for a quick job, but even careful painters make mistakes.
Here’s a simple room-prep order that works well:
- Remove switch plates, outlet covers, and any wall hardware.
- Lay drop cloths across the entire floor, not just the edges.
- Apply painter’s tape along baseboards, window frames, and door trim.
- Cover furniture with plastic sheeting, or move it to the center of the room.
- Tape off light fixtures or ceiling fans if you’re painting near the ceiling.
Press tape down firmly along every edge. Loose tape lets paint seep underneath, creating a jagged line instead of a clean one. For the sharpest results, some painters run a thin bead of caulk along the tape edge before painting, then wipe it smooth this seals tiny gaps tape alone can miss.
Apply Primer to the Right Areas
Primer isn’t always required, but it’s essential for certain situations. Skipping it in these cases often leads to blotchy color or paint that fails to cover in one coat.
You should prime when:
- You’re painting over a dark color with a lighter one
- The wall has patched or repaired areas (patches absorb paint differently than the rest of the wall)
- You’re painting bare drywall or wood for the first time
- There’s a stain, water mark, or smoke damage you want to block
- You’re switching from oil-based to water-based paint, or vice versa
Let primer dry completely before adding your topcoat usually a few hours, though this varies by product and humidity. Rushing this step is one of the most common reasons DIY paint jobs look streaky.
Frequently Asked Questions
How long does it take to prep a room for painting?
For an average bedroom, expect 2 to 4 hours of prep work, depending on how much cleaning, patching, and taping is needed. Rooms with heavy damage or years of buildup can take longer.
Do I really need to clean walls before painting if they look fine?
Yes. Walls can look clean but still carry a thin film of dust, cooking oil, or skin oils that weaken paint adhesion. A quick wipe-down with soapy water takes minutes and prevents peeling later.
Can I skip sanding if I’m using the same paint color?
You can skip heavy sanding, but a light pass with fine-grit sandpaper still helps new paint bond better, especially over glossy finishes. It’s a small step that makes a noticeable difference in durability.
What’s the biggest mistake people make when prepping to paint?
Rushing patch repairs. Spackle and caulk need time to cure fully before sanding and painting, and painting over wet filler almost always leads to cracking or an uneven surface later.
Should I prep and paint one room at a time, or the whole house at once?
Most professionals recommend one room at a time. It keeps supplies contained, lets you catch mistakes early, and makes the project feel more manageable than tackling an entire house in one weekend.
Conclusion
Preparing your house for painting isn’t the exciting part, but it’s the part that determines whether your paint job lasts one year or ten. Clean your surfaces, repair any damage, sand for grip, protect what you don’t want painted, and prime where needed. Follow these steps in order, and your next paint job will look sharper, last longer, and hold up far better than skipping straight to the roller.