

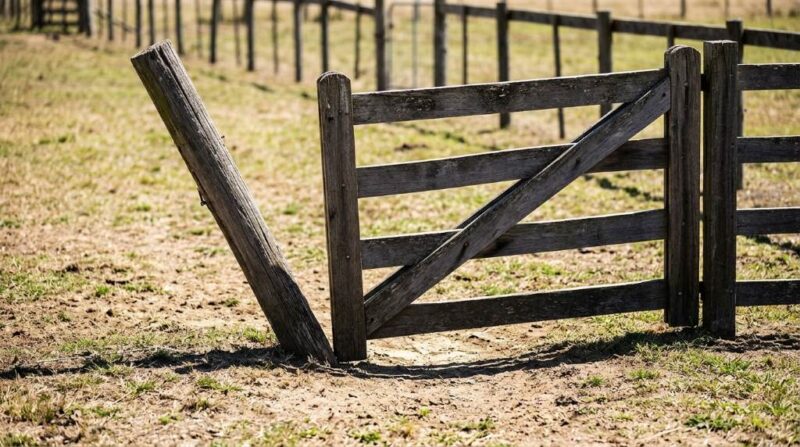
A sagging fence gate post is a common issue for homeowners. Studies show that over 60% of fence repairs involve gate posts. This problem often arises due to soil erosion, poor installation, or weather conditions. Leveling a sagging post can restore functionality and improve curb appeal. It also prevents further damage to the fence structure.
Why Does a Fence Gate Post Sag?
Understanding the root cause helps prevent future issues. Heavy gates often pull posts out of alignment over time. Wood posts can rot at the base, especially in wet climates. Poor initial installation is another common culprit. Shallow post holes or inadequate concrete footings lead to instability.
Soil movement due to freezing, thawing, or erosion can also cause sagging. Insect damage weakens wooden posts, making them more susceptible to leaning. Metal posts may bend under pressure from a heavy gate. Identifying the cause helps you choose the best repair method.
Regular inspections can catch early signs of sagging. Look for gaps between the gate and post. Check for leaning or uneven movement when opening the gate. Addressing these issues early saves time and money.
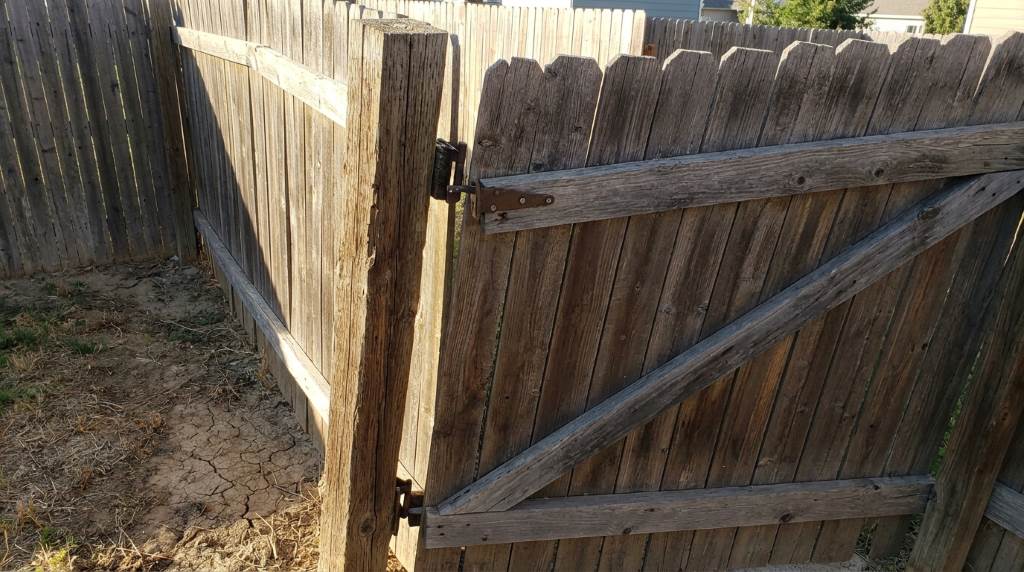
Tools and Materials You Will Need
Gather all necessary tools before starting the project. A post hole digger is essential for deepening the hole if needed. A level ensures your post stands straight. A shovel helps with digging and backfilling. A tape measure provides accurate dimensions.
You will also need concrete mix for a strong foundation. Gravel improves drainage at the base of the post. A wheelbarrow makes mixing concrete easier. A trowel helps smooth the concrete surface. Safety gear like gloves and goggles protects you during work.
For wooden posts, consider using a post anchor or bracket. These provide extra stability in loose soil. A sledgehammer may be needed to drive stakes or anchors. A drill and screws secure brackets to the post. Having everything ready streamlines the process.
Step-by-Step Guide to Level a Sagging Fence Gate Post
Assess the Damage
Start by examining the post and gate closely. Check for rot, cracks, or insect damage on wooden posts. Look for rust or bending in metal posts. Determine if the post is leaning or if the gate itself is misaligned.
Test the gate’s movement to see if it swings freely. Note any gaps between the gate and the post. Use a level to check if the post is plumb. This assessment helps you decide whether to repair or replace the post.
If the post is severely damaged, replacement may be necessary. Minor leaning can often be fixed by reinforcing the base. For slightly sagging posts, adding support may suffice. Accurate diagnosis ensures you choose the right solution.
Dig Around the Post
Use a shovel to remove soil around the base of the post. Dig down to expose the concrete footing if one exists. This step allows you to inspect the foundation’s condition. It also creates space for adjustments.
Be careful not to damage the post while digging. Work slowly and methodically around the base. If the post is set in concrete, you may need to break it up. A sledgehammer or chisel can help with this task.
Clear away debris and loose soil from the hole. This provides a clean workspace for the next steps. Proper preparation ensures a stable foundation for the repaired post.
Straighten the Post
Use a level to check the post’s alignment. If it is leaning, push or pull it into a vertical position. A helper can assist with this step. Temporary bracing with wooden stakes can hold the post in place.
For wooden posts, a come-along or ratchet strap can apply steady pressure. Attach the strap to the post and a nearby anchor point. Gradually tighten the strap to straighten the post. Check the level frequently during this process.
Metal posts may require a different approach. Use a post puller or jack to lift and realign the post. Ensure the post is plumb before proceeding. This step is critical for a stable and functional gate.
Reinforce the Base
Once the post is straight, reinforce the base for long-term stability. Add gravel to the bottom of the hole for drainage. This prevents water from pooling around the post. Gravel also provides a solid foundation for the concrete.
Mix concrete according to the manufacturer’s instructions. Pour it into the hole around the post. Use a trowel to smooth the surface and remove air pockets. Ensure the concrete covers the base of the post completely.
Allow the concrete to cure for at least 24 hours. Avoid disturbing the post during this time. Proper curing ensures maximum strength. For added stability, consider using a post anchor or bracket.
Reattach the Gate
Once the post is secure, reattach the gate hardware. Check the hinges for wear or damage. Replace any worn-out hardware to ensure smooth operation. Use a level to confirm the gate is even.
Test the gate’s movement to ensure it swings freely. Adjust the hinges if necessary for proper alignment. Lubricate the hinges to reduce friction. This step ensures the gate functions correctly.
Inspect the latch and lock mechanism for proper operation. Make any needed adjustments. A well-aligned gate improves security and appearance. Regular maintenance extends the life of your fence.
Unique Tips for Long-Lasting Results
Use galvanized hardware to prevent rust and corrosion. This is especially important in humid climates. Stainless steel screws and brackets offer additional durability. These materials resist weathering and last longer.
Consider using a post cap to protect the top of wooden posts. This prevents water from seeping into the wood. Regularly apply a wood preservative to extend the post’s life. These steps reduce the risk of rot and decay.
For areas with heavy rainfall, improve drainage around the post. Install a small French drain or use gravel to direct water away. This prevents soil erosion and maintains stability. Proper drainage is key to a long-lasting fence.
In regions with freezing temperatures, ensure the post extends below the frost line. This prevents heaving due to freeze-thaw cycles. Check local building codes for depth requirements. A deeper post provides better stability in cold climates.
Common Mistakes to Avoid
Do not skip the assessment step. Misdiagnosing the problem leads to ineffective repairs. Always check for underlying issues like rot or insect damage. Addressing these ensures a lasting fix.
Avoid using shallow footings for gate posts. A deeper hole provides better stability. Follow the one-third rule: the hole should be one-third the length of the post. This prevents leaning and sagging over time.
Do not use low-quality concrete or materials. Cheap materials compromise the repair’s durability. Invest in high-quality concrete and hardware. This ensures a strong and long-lasting foundation.
Neglecting to check the gate’s alignment can lead to further issues. Always test the gate’s movement after repairs. Adjust as needed for smooth operation. Proper alignment prevents future sagging.
Maintenance Tips to Prevent Future Sagging
Inspect your fence and gate regularly for signs of wear. Look for leaning posts, gaps, or difficulty in opening the gate. Early detection allows for timely repairs. Regular maintenance prevents costly damage.
Clean the gate and post periodically to remove dirt and debris. This prevents moisture buildup and rot. Apply a protective sealant to wooden posts. This extends their lifespan and maintains appearance.
Tighten loose hardware as needed. Lubricate hinges and locks to ensure smooth operation. Replace worn-out parts promptly. These simple steps keep your fence in top condition.
Trim vegetation around the fence to prevent moisture retention. Overgrown plants can trap water against the post. Proper airflow reduces the risk of rot. Maintain a clear area around the fence for best results.
Conclusion
Leveling a sagging fence gate post is a rewarding DIY project. It restores functionality and enhances your property’s appearance. With the right tools and techniques, you can achieve professional results. Regular maintenance ensures your fence remains sturdy for years.
Do not wait until the problem worsens. Address sagging posts early to avoid costly repairs. Follow the steps outlined in this guide for a successful repair. Your fence will thank you with reliable performance.
If you are unsure about any step, consult a professional. Safety and quality are paramount. Share your experience or tips in the comments below. Happy fencing!
FAQ
How long does it take to level a sagging fence gate post?
Most repairs can be completed in a few hours, but concrete may require 24 hours to cure.
Can I use wood glue to repair a cracked post?
Wood glue can temporarily fix minor cracks, but replacement is often better for long-term stability.
What is the best material for a fence gate post?
Pressure-treated wood or galvanized metal posts offer durability and resistance to weathering.
How deep should a fence post hole be?
The hole should be at least one-third the length of the post, or below the frost line in cold climates.
Do I need a permit to replace a fence post?
Check local building codes, as permits may be required for structural changes or new installations.